


Using common household materials, this face mask is the closest homemade approximation of an N95 face mask yet. A lot of work went into this one during a pretty stressful time but hopefully it is helpful to people.
Template at bottom of page
[UPDATE, July 2020] – There has been some amazing feedback on this mask as well as photos, videos & tips improving on the design. After I released this one I immediately filmed a simple summarised tutorial on making the mask using just an iron, hot glue and scissors. The updated follow up video can be found below.]
A proper N95 or P2 mask is always the best choice- and this shouldn’t be used to supplement one, However with short supplies, this homemade mask is far superior to cloth / cotton and loose fitting surgical masks.
Rather than cotton It uses common non-woven material which can be sourced from common items like reusable shopping bags. This can be stacked to your filtration needs.
At a minimum it can be made with just an iron, scissors and hot glue.
However by using a hot wire more masks can be cut at once.
Of the nonwoven polypropylene I had on hand, I found it was best use 3 to 4 layers of the car cover which is around 100 GSM per layer and then one layer of a surgical gown which is about 50 GSM. As a loose guide based on my research car covers are about a 100 to 150 gsm. Shopping bags are 80 to 100 gsm. Disposable painting overalls and surgical gowns are a bit lighter and about 30 to 50 gsm.
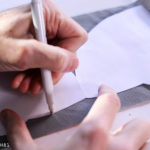
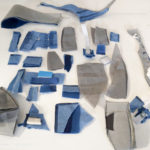
So if you’re just making the one mask you can use a template to trace it onto each of your layers and then cut them out scissors.
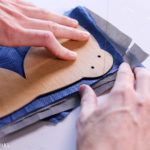
I’ve stacked all of my layers in order with one of your thichest on top. Additionally to make it easier to cut more in the future I traced and then cut out a wood template so I can run the hot wire along its edge. It was a time saver but in hindsight, using aluminium plate would have been a better than wood because the wire can burn little notches into the edge of the template.
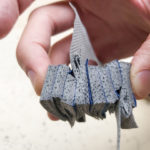
With the hotwire Experimenting with how many layers it could do at once, I pretty much got to the limit of how many I could stack in a pile.
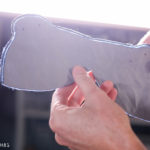
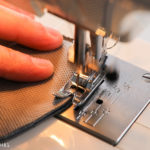
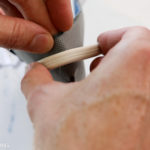
Your iron may differ but from the two that I tested it this was about maximum heat or slightly under. With the front of your mask Facing up use the back corner of your iron holding it at about a 30-degree angle, with the bottom of the iron facing to the outer edge of the mask. Then with a fair bit of downward pressure you can slowly advance forward around the edge of the mask, aiming about 5mm in from the edge. Make sure you do a bunch of test runs until you find the right combination of temperature, speed and downward pressure. It’s tempting hold the iron flat but it simply doesn’t work to bond through all the layers.
I did hours of tests to find the right technique
Use scrap to check the iron is the right temperature
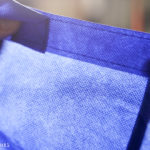
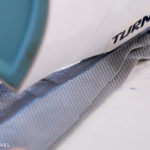
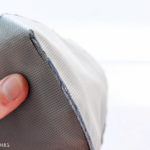
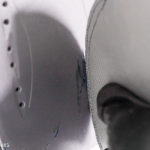
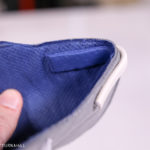
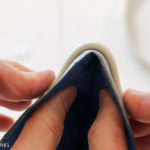
The best way to see if you’ve been successful or not is to hold it up to a bright light and you should see a translucent line around the entire edge.

Looking on the other side of your mask you should see a shiny depression around the inside edge of the mask.
This part of the seam needs to be strong but sit flat with no air gap on your face
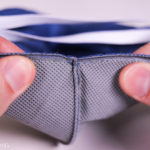
My favorite option for the front seam is running a double stitch down and then using the iron to melt the plastic to seal up the edge. If you really in a desperate situation I imagine you could do this with gaffer tape as well – or even a hot glue gun.
The front seam can be welded but i found sewing or hot glue was best so far. The multiple layers can be thick!
Melting the front seam after can help seal it
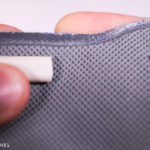
Soldering iron with a bolt in it is great for welding the elastic on
Inside of welded elastic should show a shiny dimple
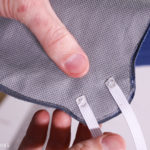
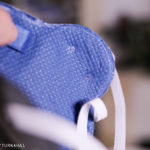
Elastic can be attached using a stapler. To do this – for strength – lead the elastic in from the opposite direction to where it will be pulled from. Then put the staple through
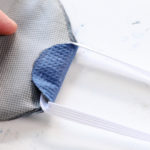
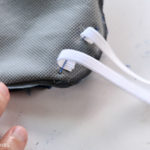
Elastic alternative: There is one more option as done on some n95 masks, and we’ve allowed for this in the template but you can fold the edge of the mask over onto itself, tacking it in place with hot glue and then running the elastic through the loops that you’ve created. Doing it this way can also allow the elastic to be more easily adjusted or replaced.
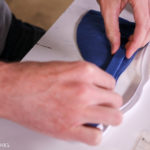
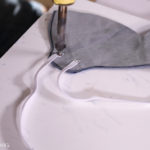
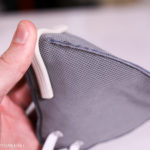
NRB foam from a gym mat used the nose seal
Pre-Bend the nose with when about to glue in place
Hold the hot glued nose bridge wire untill it cools
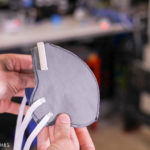
Finished homemade face mask
Sewn front seam prior to melting to seal it

Complete mask. I think this one is 4 or 5 layers
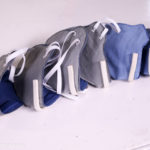
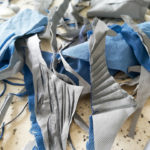
Some of many prototypes experimenting with filter layers
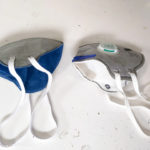
Comparison to a P2 face mask (which is the Australian and European N95 equivalent)
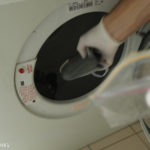
Air the masks in a dryer with the heat off to get rid of and plastic debris or glue smells.
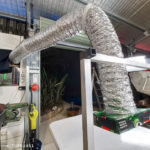
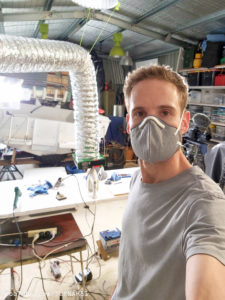
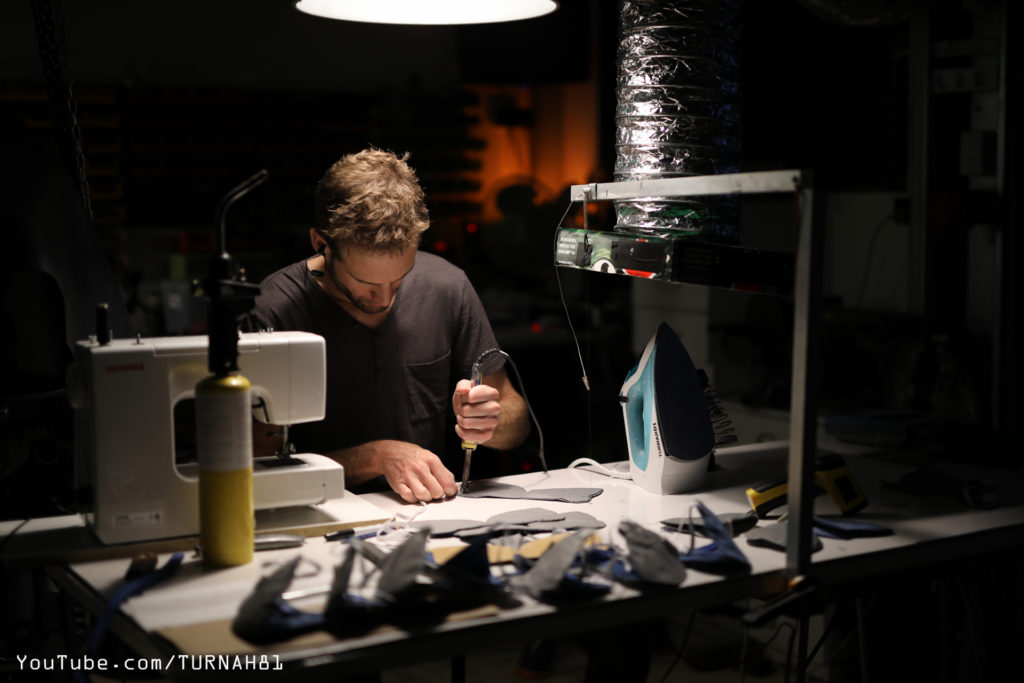
If you use a hot file you might need a well ventilated area.I ended up whipping a quick fume extractor arm out of a beer carton, but you won’t need too for just ironing.
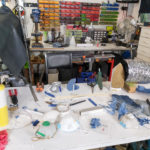
Early experimenting

Blue lights make the extraction fan much cooler looking at night.
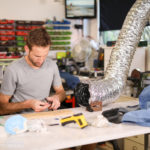
I’m cutting something with scissors, probably something important, or just my finger nails.
Similar to an N95 Mask the seams are plastic welded which prevents air leaks around sewing holes. This can be done with an iron.
Elastic can simply be stapled or hot glued.
However welding it with a soldering iron gives better strength, heat & chemical tolerance, like done on N95 masks.
Fitment is THE most important aspect of any mask. To stop air leaks around the nose flat electrical cable is used and a strip of soft foam rubber which can be sourced from an exercise mat.
N95 masks often have additional additives to increase filtering efficiency and breathing comfort however N95 masks should be preserved for health care workers.
Remember a mask is only effective if used properly with other preventative measure.
Update regarding filter material: Viewers in the USA are now messaging me indicating some companies are now selling rolls of medical grade, filter specific material in rolls intended for use in home made masks. Apparently it is melt blown polypropylene (more efficient) and can be integrated into this mask design well between the spun bonded polypropylene layers- as used in the video. I havent tested this though.
Also many are successfully using MERV13 filter material and reporting great results. Although I wouldn’t endorse it- Some health care workers have indicated with these filters and tight elastic, the design has past fit testing with an aerosol in their which is great to hear.
Bob has a great video here showing improved batch making technique including the use of a MERV13 filters. https://youtu.be/RvLvvJpFcnc
Printable Mask Template
Below is the printable mask template. (Updated Pattern with grid overlay)
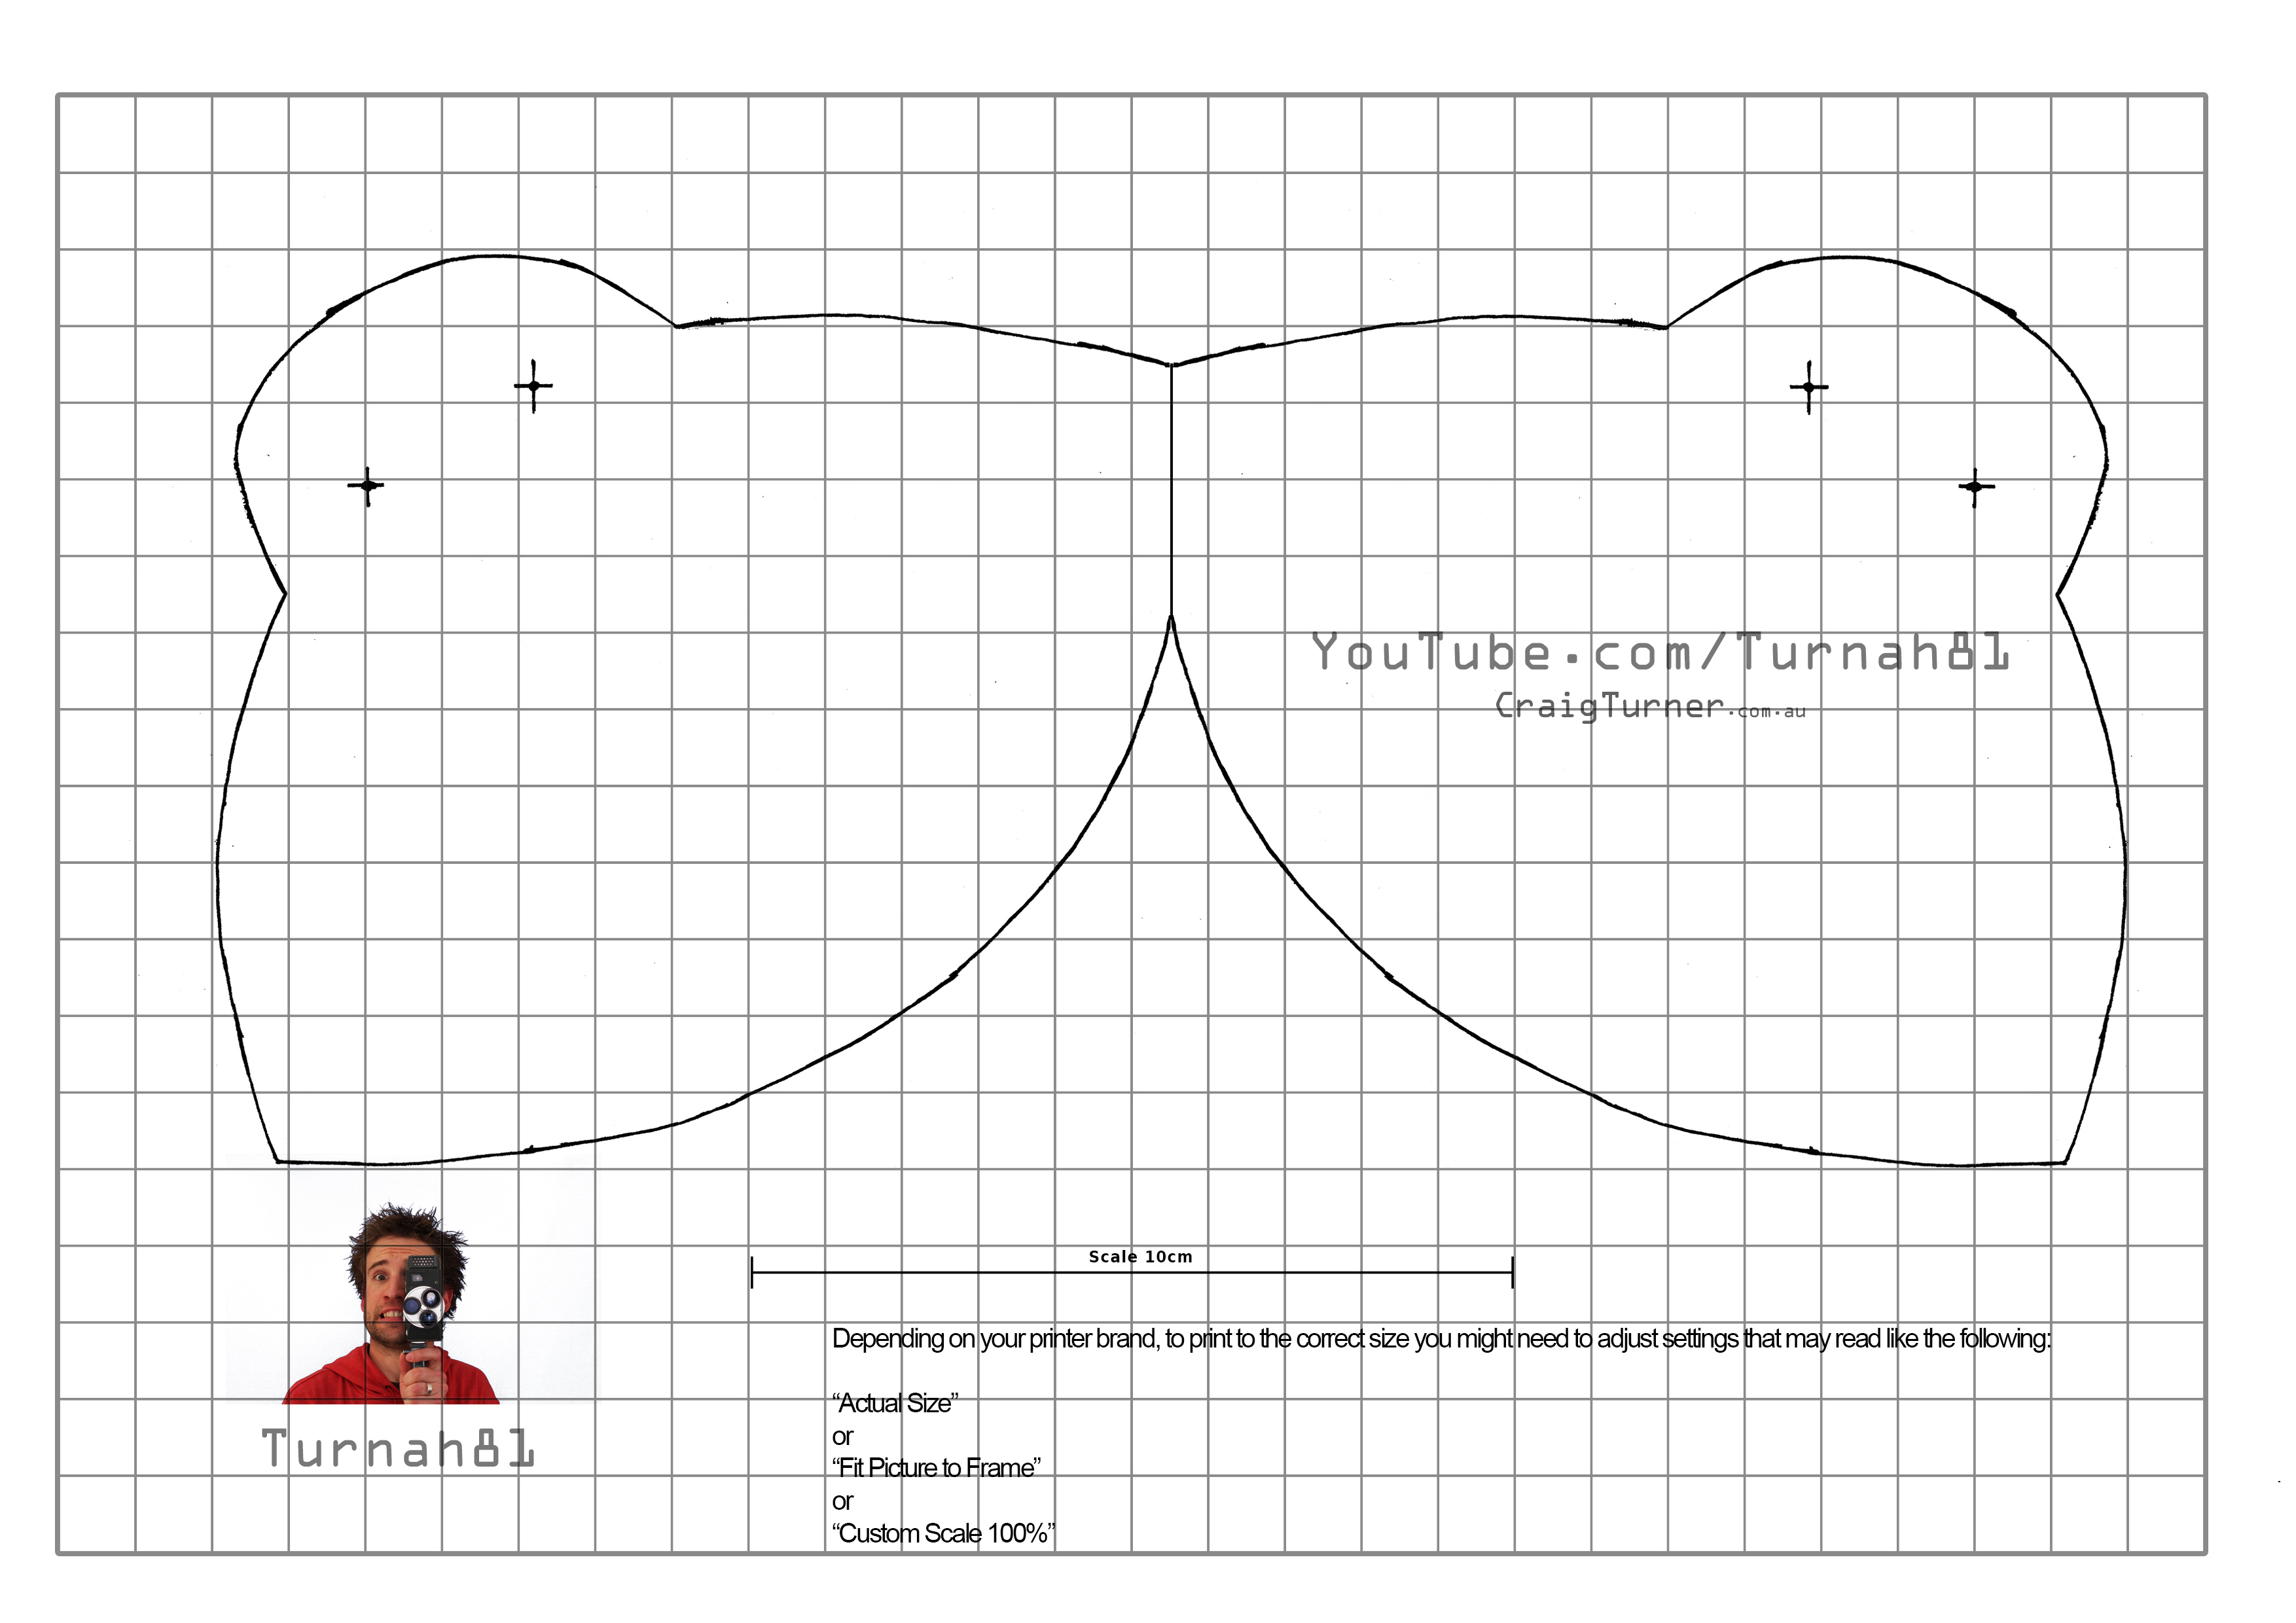
When printing set the print to international
A4 size and once printed check the scale with a ruler in case the printer does anything weird.
If you have no printer, using grid paper or ruler you should be able to approximate the shape with a pencil. Some people are also tracing it from their screen.
Alternative Templates:
Big thanks to Rudy Fernandez for creating the following engineering diagram of the mask design here:
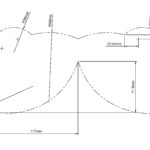
mask_dimensions-by Rudy Fernandez
mask_No-dimensions-Rudy Fernandez
3D Object on Thingiverse.com by Ed Tannenbaum can be found here
Another 3D printer template available at cults3d.com by etarts: here
Thanks heaps for you support on the channel. I hope this is helpful.
Be sure to check back for updates to this design and method.
Cheers
Craig & Kristen Turner
As a disclaimer though please do keep in mind I am not an expert. This information & video should be interpreted as theory, my own experimentation & entertainment only. Seek professional advise, do your own research and use these instructions at your own risk.
![]()
Thanks Craig for this.
Im from South Africa on a farm that delivers an essential service so while the rest of the country is on lockdown, we keep on working. Its harvest season and we have around 100 seasonal workers on the farm with a world wide shortage of N92 masks.
We are now going to attempt to ‘semi-mass produce’ this mask for our labour force.
Im sure it will be more effective at protecting us all compared to a cotton cloth.
Once again, thank you for this, I will let you know if we succeed.
Hi Francois. That is great to hear. I hope it works out well. If you can make your self a aluminum template with a polished edge based you should be able to cut at least 5 to 6 masks at a time (approx 20 to 30 layers at a time) however I found you have to move slower on a hot wire so the wire doesn’t curve without you knowing from drag. My brother actually has a chaffing plant for feed. I believe they are having trouble with masks too and need to keep operating. Let me know how you go. – I will be posting the tips and experiences of others too – some good ones have already started coming through.
Awesome, idea and implementation, I found some old non-woven bags, going to try this out, I am currently converting the image into a .DXF file for cutting on laser cutters and CNC cutters (Cricut). Let me know if you want the files to post on the website. Elliott
Hi Elliott, Yeah awesome do send through. I was curious how this might go on a laser cutter, especially when I was shaping the wood template with hand tools. Making an aluminum template would have been better too. Cheers.
Hi Craig, Thanks for sharing your design. Using your template I have converted it into CAD files and an STL file.
If you would like to share these files I can email them to you to include on your site, please let me know.
Regards Dave
Hi, could u share it to me?
Thank you all!
Hi Dave. You can grab the template here: http://craigturner.com.au/wp-content/uploads/2020/04/Final-Mask-Template-Turnah81-with-Grid.jpg All the best.
It will be great f you can share this CAD and STL file. Can this be used for 3D printing the temaplte.
Please share the Cricut pattern – that would be awesome! Could make them far easier/faster for hospital donations 😊. Thank you!
Elliott, very cool. There wouldn’t happen to be an easy way to make that conversion to an stl file for printing on a 3D printer, would it?
Can confirm laser cutting also works well (but not entirely necessary, for those without one).
I saw a comment left by Misty Fairy on your YouTube video that is extremely helpful for the polypro welding.
“You can sandwich your fabric between pieces of parchment paper to prevent getting melted plastic fabric all over your iron.”
I tried this after having failed no matter what iron technique I tried, and it worked AMAZINGLY! I just sandwiched the material between two pieces of parchment paper and used your iron technique that over the paper, but I went a decent bit slower than you (to get a really good weld) and it was perfect. Still flexible, no holes, and a whole heck of a lot stronger than without the parchment paper.
Thanks for your hard work!! Going to try and cut this with a laser. Does the *.DXF (or DWG) file exist and if yes, can I get a copy :-)? chammock@ahpengr.com
Chuck Hammock, GA-USA
Can you please provide the measurements for the mask for those of us without printers? All the places I use a printer (work, library) have been closed since mid March. I would like to try this. The best way would be on a grid but even just providing notated measurements would be good enough for free hand drawing. Thanks.
You could use a ruler and match the 10cm line on the pattern to get the image the correct size on your computer monitor. Then hold a piece of paper up to your monitor and trace the pattern.
Yeah man for sure. I tried it with a tablet but the screen was still active through the paper but if you avoid toughing it a pencil may be fine. Then scroll the image progressively move over the whole pattern. Cheers
Check out my video on YouTube
https://youtu.be/enR2xKOkP0s
I copied his free pattern without a printer .
He also has a pattern on a grid.
nice. It does the trick. cheers
For US Letter Paper, set the scale factor to 139%.
When I did that, I got a scale line that was just about exactly 10cm.
Hi Craig,
Thanks for the walkthrough. I’m partway through my own trial and error process and your video will help greatly!
I am curious if you considered a top layer application of Citric Acid (or lemon juice) to the exterior surface. From my research it is the active ingredient of one of coatings used on some masks [e.g. Actiprotect UF N95 is coated with Virucoatrm on the outer layer (active ingredient: citric acid, 1.8%)]. My understanding is that it will not help with filtering but it will help reduce transfer for when the a-hole is inappropriately touched.
https://www.accessdata.fda.gov/cdrh_docs/pdf8/K081923.pdf (Bottom of second page in doc, #5)
Great great idea!
I wouls like to know how many layers of polypropylene is needed to make it ?
Nice video Craig.
Any idea what this type of mask is called? I’ve been making fabric Olson Masks like a couple of the hospitals have requested. I 3D printed the template. I’d like to find a 3D template for this one to make this style mask. Seems to have a much better fit
Hi Craig
I thought this method was brilliant, especially because of not putting holes in the mask with a sewing maching. I cringe everytime I was a video where they put pins in the mask.
I tried this method with my iron, several times (20). I either get no melting or it melts to nothing or doesn’t melt through all layers or I can see a lot of holes when lifting up to the light. What am I doing wrong. I have tried using the non-woven polypropylene shopping bags and suit bags. Same result. I am thinking of sewing and then sealing all seams with a glue gun but am hopeful I can figure out what is going wrong with the iron method. Thank you
One person in the comments of the youtube video suggested sandwiching the fabric between two pieces of parchment paper when ironing. Someone else replied that the method worked great for them. Give it a shot.
Melting the edge with a soldering iron, then pinching, works really well. Creates a very strong seam.
Instead of using a glue gun, you can use non-woven surgical tape. The most narrow one is usually 10mm, which is pretty perfect for this purpose! The material in the tape is the same as in vlieseline, which is used a lot in sewing. Sure that material would be great for layers inside the mask as well. You can get Vlieseline in fabric stores, just make sure you get the one without iron on glue (one side is shiny, you want the no shiny one). ☺️
Your video is awesome! Im a nurse and have been looking for diy masks for the shortage we are still experiencing. I am definitely trying this with one added merv 13 layer and silicone around inside surface where it hugs your face and will report back after fit testing. Thank you for the iron technique- it makes all the difference.
Again, Thank you so much! You would think we would have proper Personal protective equipment by now but I have worn the same employer provided mask for 5 – 12 hour shifts now. Then they want us to have it “disinfected” and wear it for another 5 shifts. What a joke…I made yours with the above mentioned adjustments. It fit tested well under ammonia chloride with a tighter double strap around head and neck. It is more difficult to breathe through but I have been wearing these for past 2 weeks, had to sign a waiver at work of course; but I am happy to report no illness or symptoms.
Please send measurements and a free – hand cut plan if you can …very interesting and could the tip of the iron work to weld the elastic , I have no soldering iron
Hey Carl. I have updated the template with measurements- well a grid which is better. I found the iron was not hot enough (180 C) you need about 300 C for the elastic. Hot glue is a pretty good alternative though.
Hi Craig, I cant seem to find the printable link for the template. Is it on this page ?
All updated cheers
Hi Craig, I don’t see a download link for the picture. When I save the image it is just a thumbnail and I can’t make out the words or dimensions. What size is the grid? I can use BigPrint program from Matthias Wandel to set it to exact size for printing. Or tweak the scale of it if I want a little larger or smaller. Thanks.
All updated cheers
Hey Craig It’s amazing what you have achieved. I will certainly make a couple of these. I can’t print the template, it’s too small, would you be so kind to send it to me?
Thanks
Thanks heaps for your feedback page is all updated cheers
My printer printed a small version as well. It turns out that if I cut out the grid from the middle of the page and printed that 124% larger, it works.
The shape chosen is very similar to those used by son at his company , they use solvents and come into contact with fine MDF dust and the masks are made to the 06 standard not 95 but with the pressure release valve , 5 layer 3M filtration media , silicon foam surround sealers etc . They change them daily so have plenty in stock .
They had been building mobile isolation units but now the government in the UK decided they were not an essential company of specialist coach builders to keep open .
The upshot of this is they have hundreds of masks and suits in storage just sitting there ! I would imagine there are many companies around the globe that use this standard of PPE which have closed as being non essential and have stockpiles of masks that could be put to good use .
These masks have a welded on double hook for replacing elastic and the elastic is adjustable with a silicon slip ring , so one size fits all .
Hi! Thank you por this information! I will try to make a few masks for my family but the resolution of the pattern image is a little poor for printing or zooming so I can trace it in paper.
Is there a link with the pattern in a better resolution?
No worries, thanks for the support. Page is All updated cheers
Image is missing link to the full image so that the template can be printed. I guessed and found this for others interested: http://craigturner.com.au/wp-content/uploads/2020/04/Final-Mask-Template-Turnah81-with-Grid.jpg
Thanks bc I didn’t see it from him
What happened to the template link? I see the small image but not the PDF template you had on here before.
All updated cheers
Decided to try your mask but sewed it because I didn’t want to mess with the fumes. Made a few other modifications, 1 cloth (multiple layers), used a metal binder prong for the nose to help seal the mask and added a flip down flap to house the nose piece. Also had to enlarge a little so I could stitch the edges and turn it inside out so it doesn’t fray and looked more finished. Also enlarged it because my husband is a giant and needs extra large clothes 😉
My canon mg3022 printer doesnt have the international print option!😪 I set all the other preferences according to your directions but that’s the only setting I’m unable to find!! I have printed this pattern like 6 times each with different settings and none of them have came out to where the bar measures 10mm 🙁 cant figure it out so last option was to comment and hopefully get a tip from you!😂 thanks in advanced..
– Kelsey
Btw I’ve watched so many videos looking for a mask to make but couldnt find one “worth” making seeing as I have a surgical mask.. but this one is definitely a winner! Thank you for sharing!!
Thank you, well done, very informative, easy to understand, and hopefully a help to folks. Probably the best homemade mask guide I’ve seen yet.
Hi,
Looks like a great design! Thanks for sharing Carig – planning t to have a go at making somethink like this. Have you thought about using a sandwich bag sealer to do the plastic welding – do you think that would work? I was thinking of giving it a try
Also you can stick the elastic on with superglue.. seems counter intuative but my mask broke and it seems to stick to polypropalene like sh*t to a blanket.
Also have you thought about soaking one layer in activated charcoal
(I think some of the proper masks have that + Citus Acid soaked layer).
Mind how you go
Do you think one of this :
Handheld-Portable-Reseller-Plastic-Included
could help to seal the mask edges?
Thank you for not giving up Craig. I am convinced that your efforts will save lives.
My cousin has made about ten of these and I’ve compiled her tips.
Material substitutes
Metal clasp for the nose: coffee bean and bread ties are good, but we quickly ran out of those. As a replacement straighten out metal paper clips with tongs and hot glue two in between some of the mask fabric to make new clasps. They’re the perfect size and work well.
Foam for the nose: we used a yoga mat that had the perfect thickness (3mm) but noticed that wearing the mask left a gap. To correct this glue wider pieces of yoga mat to the mask, a small incision in the middle of the foam made room for the nose bridge.
Fabric clamp: many layers to work with, to clamp it together hair clips/bobby pins were used.
Rotary cutter: helped with a lot of the fabric cutting. We put a hard cardboard template on top of about 8 layers of fabric. The cardboard helps guide the rotary cutter which makes the process easier. It doesn’t get into the nooks and crannies but it’s great for the longer lines.
Baking paper: a must for us. Use it when ironing so the fabric doesn’t melt on to the iron.
Adjustments
Mask template: the corners that the bands are connected to were enlarged and made more angular. We didn’t have a tool that could get hot enough to attach the band so we use the folding technique. To make this easier and cover more of the face we enlarged the sides a bit.
Mask sealing: the seam that runs all the way down the face was difficult to seal. Ironing one side long enough to melt through all of the layers would end up burning some of the fabric. Doing both sides over and over made the fabric too brittle. To amend this iron it together like normal and then when the mask is near completion (before the bands are attached) use hot glue all along the seam of the mask on the inside. The glue is hot enough to melt the mask fabric and as the two sides are side by side it ensures that both sides meld.
Mask band: instead of using two smaller (28 cm) pieces of stretch band to secure it to the face we used one long band. We found that this was easier to put on and different hairstyles didn’t get in the way. Using the ears as anchors would help but that would chafe after extended periods of use. One long band has to be used with the folding technique.
Fold and glue the sides of the mask but make sure to leave enough room and clear channels for the band. Thread the band through the two glued channels and tie it together. To put the mask on pull the bottom of the band over your head, adjust the mask over the face, and then pull the top of the band over your head. One connected band makes it so you get more leeway when putting the mask on because the band doesn’t need to stretch to fit over your head.
I hope her tips will be of use.
Hi Craig,
I am not sure what happened to my last comment (do they need approval before publishing?) so I’ll paste it at the bottom of this as I think some will find it useful. I wanted to suggest making a new version of the video that’s shorter and focuses solely on the actual construction. With so many different mask tutorials out there I believe it could attract more viewers and mask crafters.
I have found weed control fabric to be a good cheap supply of non woven polypropylene. 20 metres x 1 metres for £4 in the UK. Would a strip of hot glue work instead of the foam? Quick and easy to do, wont come off. May not form as good a seal as wont compress though.
I have been curious about garden non-woven polypropylene but haven’t seen it in person. Hot glue is too hard unfortunately. It needs to be as soft as your skin in order to seal the gap.
Hi Craig, thanks for the template. It looks a lot better than other masks I have seen. My husband was asking if it can be washed and reused or if it should be disposed of after a day. What are yout thoughts on that?
Yes I have found you can wash with a disinfectant. I wan’t to try and find a washing powder though that has no fragrance – I’m pretty sure they exist – this would be preferable.
We buy non-scented laundry detergent liquid. If you can’t find any in the main aisle of the supermarket try in the baby section or look for eczema/sensitive skin friendly brands.
I had an idea you could make the nose pieces out of a Fizzy drink can by cutting it open and flattening it out and then cutting long oblongs. It’s about the right thickness of Ali. Just be careful you don’t slice yourself open and round off the corners. Use a pair of tin-snips or a good pair of Kitchen scissors at a push! (will ruin the scissors unless you can sharpen ’em again!). Then just glue em on with super-glue.
I am trying to make a device to mass-produce similar masks using a hot bag sealer and a DIY sealer with a custom element. I am making the DIY curved element out of a bit of mild steel rod I had in the shed.
Also I’m planning to put heat-shrink tubing around the mild steel rod (you could perhaps find a bit of rod from an old piece of metal fencing or sumink and bend it up with some pliers/vice etc.) This hopefully stop metal sticking to the plastic.
Also I think just getting a mister spray bottle (like you use for gardening) and filling it with citric acid solution and just spraying the outside of your mask could be very effective.
[Sorry about the 3 random messages, you have my permission to combine them into one post!]
Great job Craig. I have been sewing masks and wondering about puncturing the fabric every time I do it. I don’t use pins at all when I’m making them but just the sewing machine needle going through creates an opening. Trying to figure out a way of sealing those seams and maybe I can figure something out with your techniques.
Note of Caution: I wonder if the landscape fabric may have weed control chemicals in it? I’d be cautious about that maybe?
Hi THanks for commenting. Yes apparently some people have said that the holes can be sealed with fabric glue or even bees wax. I haven’t tested either myself though so can’t verify it. Cheers Craig
hi, how do I figure out if my fabric shopping bags are non woven and appropriate for this technique?
Material wise visually compared to the shots in the video is all I can really offer (the little dots are a key), I could also tell from the smell when melted- if you are familiar with common polypropylene rope when you melt the ends to stop it fraying . I can’t advise on the density that you may have though. (I found 5 layers of a shopping bag for mine)
Just tried making the masks. They were a little snug for talking, but other then that worked great. I still don’t have the hang on the iron but next ones I should. I put hot glue over the ends of the wires. Also I tested along side an old N95 and sniffed a bottle of bleach, this mask out preformed the N95, I did smell a tinny bit of bleach with this mask though. I will be using these as a vendor at a farmers market so will need to make them a tinny but bigger. Thank you sooo much for the design!
This is a better template than the pm2.5 flu mask design I have, which uses 8-12 separate pieces. THANK YOU! (The shape is the same, but in a single piece rather than many sections.)
I was already thinking of using 3 types of material: tight weave fabric to make it look good and avoid chafing, the non-woven bag material and a filtering layer. which equals the thickness of your design, using fewer layers of fabric.
If you absolutely have to use stitching instead of heat bonding, use the “surge” stitch instead of the straight seam stitch, then use bias tape over the edges with the regular seam stitch. It makes a tighter fabric seal and you can run the edge of the iron over the bias tape to avoid melting through the polypropylene layers and it will seal any holes created by the stitching. The bias tape will also help create a tighter seal around the edges of the mask. Just make sure the overlapping edge of the bias tape goes under your chin. That area is less exposed. (seal the overlap seam with fabric/craft glue which is flexible and soft.)
An alternative is to apply fabric glue around the edges, making sure it penetrates each layer. Let it set, then run bias tape over the edges and apply the iron. I am not certain how much of a seal that would make, as you want to be sure the polypropylene fuses to the bias tape, magic stitch would be better in this instance. You will need to apply the magic stitch to each side of the bias tape. This step will take a bit longer, but you will get a more secure seal.
Nose strip: If you have to use a flattened heavy paperclip, measure it a little longer than what you need and using a pair of flat edge pliers, make 3 coils inward from each end (making sure the coil is flat!), then apply to mask using the hot bolt trick Craig mentioned by applying the heated bolt tip to the coiled end of the strip. The coil is a jewelers handcraft trick for wire wrapping and prevents the ends of the paperclip wire from punching though the mask or poking you. (alternative: before attaching strip, center as best you can, position. make a mark on each side of the end coils, apply a drop of craft/fabric glue in the center of each marked spot and place the nose strip. let dry and place another layer of glue over the coils and overlap the edges.)
The 3 main points of any mask like this are: Density (to reduce particle penetration), Breathe-ability and Tightness of the Seal (you know you have a proper seal when you breathe in and the mouth and nose area collapse against your face with little to no air pulling in around the edges.) Even Surgical masks abide by this rule.
Also note that no face mask is 100% effective (even surgical and N95) unless its a self-contained air supply with a solid seal and high grade filtering (think space/deep diving/hazmat suit!).
Safety Tip: “ALWAYS” remove the mask from the straps to avoid touching the face area. Pull outward and toward the front of the head with your chin pointed slightly down if using the double strap, or hooking fingers under the straps behind the ears and pull outward away from the ears and toward the face with your chin slightly down if using hoops. WASH hands immediately. (you keep your chin down so that the mask falls away from the face on its own.)
[warning: you are better off using just the citric acid coating as an extra precaution against CV-19, it is anti-microbial. do NOT use activated charcoal in regard to CV-19. that only protects against the common flu and CV-19 is not a flu. The CV-19 virus particle is MUCH smaller than the flu particle.]
{I am a former military medic!}
I have watched a ton of different mask tutorial videos and read a lot of articles on the performance of different fabrics – I think this was so comprehensive and informative – thank you for doing the research and creating this step by step how to!!
For those of you trying to print on 8.5×11 like me – I simply pasted the image into a new word document (make sure you include the 10cm scale line) and then changed my setting to show the ruler above in cm (File- Options – Advanced – Display section – change from inches to cm) – then I drew a line that was 10 cm long (just make the line, select it, go to Format – Width – manually enter 10 cm) – then make sure you have sized the image so that your 10cm line matches the original. Hope that helps!
p.s. I will be attempting to use a needlecraft iron in place of a regular iron – it has a tiny little iron plate 🙂 wish me luck!
Hi. Can you think of a way to make a clear panel in this mask so that deaf folks can lip read? Would be enormously helpful in my work with deaf children. Ta
You’d want something like clear vinyl (well washed to remove chem residue).
Make a cutout shape (square, circle, oval etc) in the center of the fabric where your mouth will be, I suggest the oval as it is less hassle and takes up less area and provides a full view of the lips.
You will have to center it between the fabric layers, seal with fabric glue, dry, then cover the edge area with a smooth thin cloth (lens) and very carefully run the tip of an iron around the perimeter on both sides, let cool and then apply a line of fabric glue again around the edges inside and out. This will make sure you have a solid seal.
Alternatively: you can make a more rigid panel with a piece of bottle plastic or two laminate sheets where you overlap the panels before heating… the laminate is a little more flexible but still holds shape.. you will need to press mold the plastic or laminate very carefully with lower heat to shape it to the mask.
[Caution: there is a trade off to this variation! It will reduce breathe-ability and if you don’t speak slowly enough, the clear panel will fog over. make certain you form the mouth shape correctly.]
I actually suggest using a “visual” form of TTY. It will be a little slower, but it is effective. (many, many, many moons ago, I created the original finger speak logo for the Deaf Aids Project – DAP, when they were first forming.) I have several deaf friends and I understand the need for being able to see lips move and proper facial expressions. the masks will interfere with that requirement of signing.
Great vid Craig- informative and entertaining!
I’m wondering if you have any links for the medical fabric inner layer scrubs, or whatever you used/ any alternatives? Having a bit of garment construction experience, I’m wondering if you are familiar with fuseable polypropylene interfacing?… could be an option. Available on eBay.
Now I’ll be bingeing you’re vids… cheers KG
Making a wooden template is worthwhile, as then you can use a soldering iron with a fat tip as a hot knife to both cut and bond the layers in one operation. For me 200C worked well on three layers of non-woven weedmat. I used a piece of glass to cut against, as the melted fabric doesn’t stick.
For the front seam I used a sewing machine with an overlock stitch – I couldn’t get the hot seal method to work on 6 layers! Flipping the seam to the inside helps with shape, and looks nicer too.
Thanks for the video